記事公開日
【Kiro Configuration】 Trying Out Kiro's Agent Hooks!
Key Takeaways
In this article, we introduce how to automate documentation updates using the "Agent Hook" feature of the autonomous AI agent "Kiro".
- Automation with Agent Hooks:
We explain the mechanism where specific actions (like saving or editing a file) trigger the AI to automatically execute tasks (such as creating documentation). - Easy Setup with Natural Language:
We show how you can create a Hook simply by asking in a chat format—for example, "Add to README when a Python file is saved"—without writing complex configuration files. - Verification in Action:
We demonstrate how setting up a Hook automatically generates and updates a README.md just by writing code, comparing the results with a no-Hook scenario.
Hello! I'm Kikuchi from the DX Solution Sales Division.
Do you find yourself putting off documentation updates during development because it's a hassle?
In this post, I'd like to introduce Kiro's "Agent Hooks", a feature that solves exactly that problem.
For an overview of Kiro, please see the blog post below.
This blog is available in a Japanese version.
What are Agent Hooks?
Agent Hooks are a mechanism where a specific user action serves as a trigger for the AI Agent to automatically perform an action.
- Trigger: The event that activates the Hook (e.g., file save, creating a new file).
- Action: The task performed by the AI Agent set in the Hook (e.g., code generation, file updates, document creation).
Benefits of Hooks
The biggest benefit is task automation.
For example, if you set up a Hook to automatically update the README when a new feature is added to an application, the developer can focus solely on editing the source code and leave the documentation updates to the AI.
Hook Setup Steps
Let's actually set up a Hook that "appends the edit content to the README when a Python file is edited."
This assumes that Kiro is already installed.
1. Opening the Settings Screen
Launch Kiro and click the Kiro icon in the left menu.
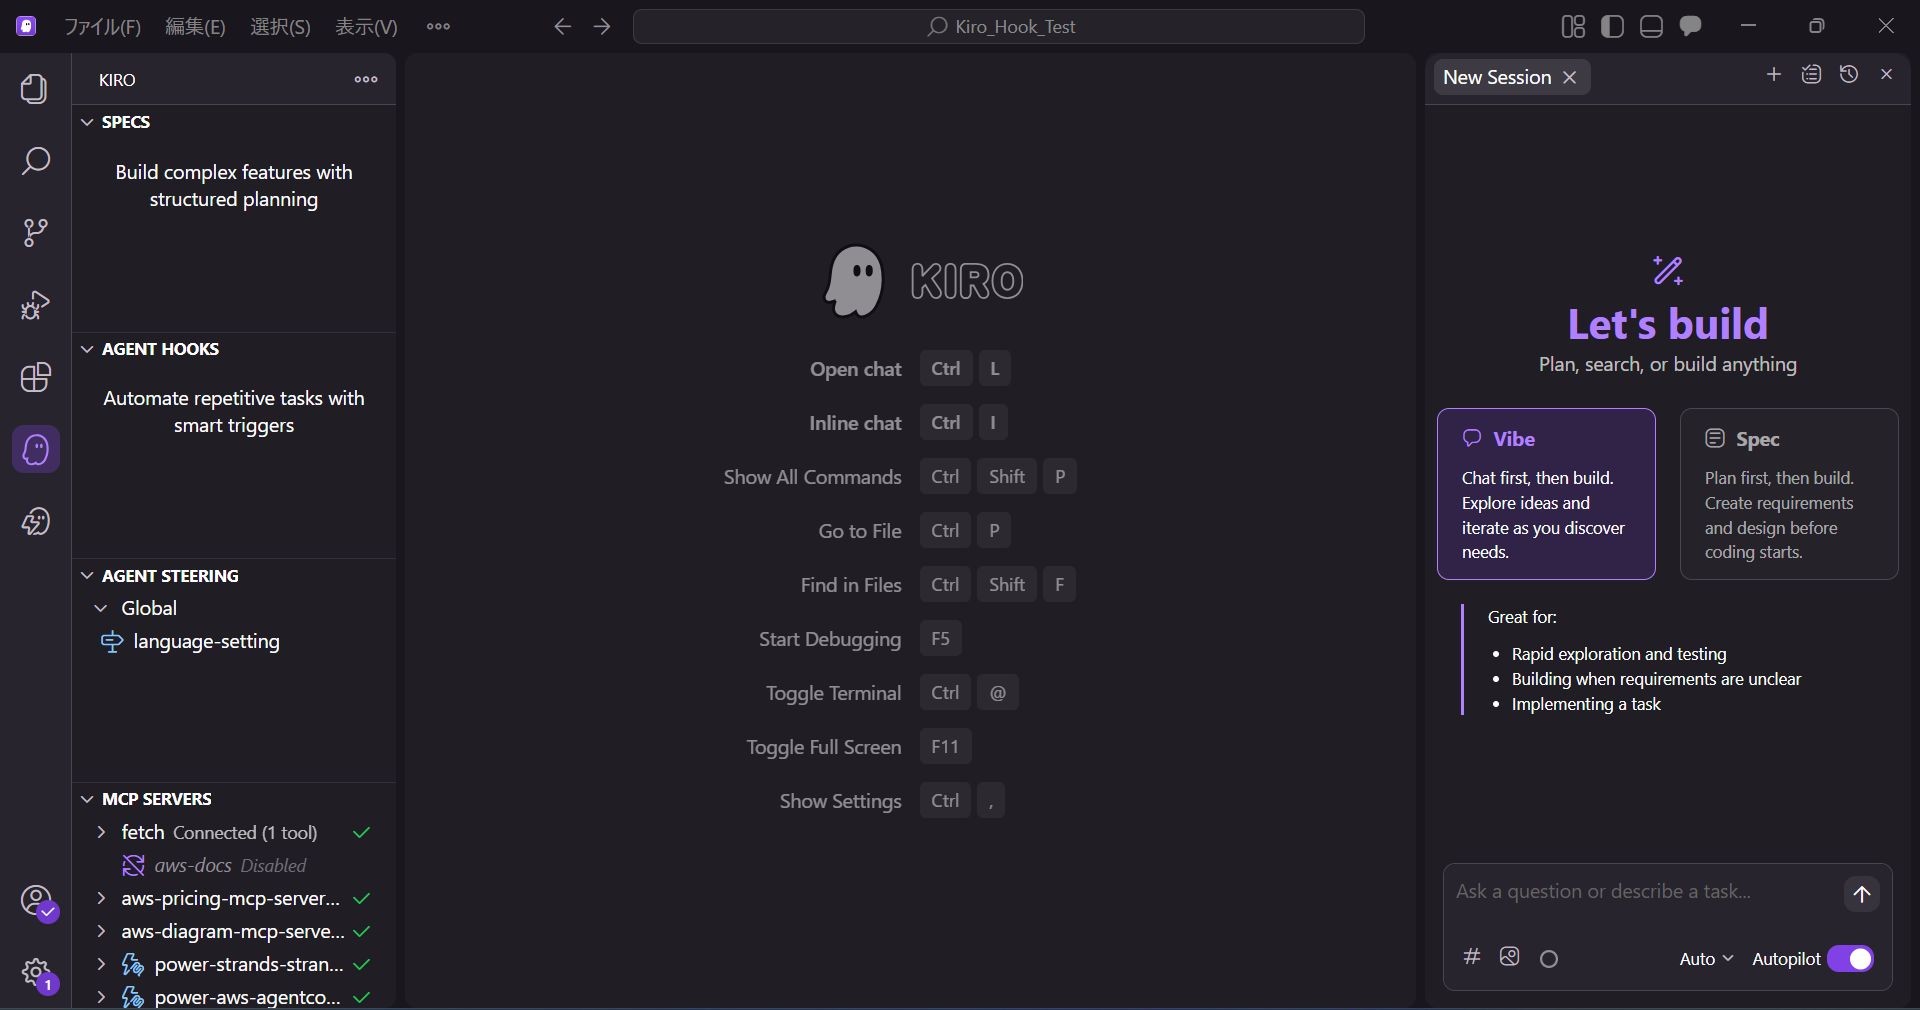
Hover over AGENT HOOKS and select Open Kiro Hook UI.
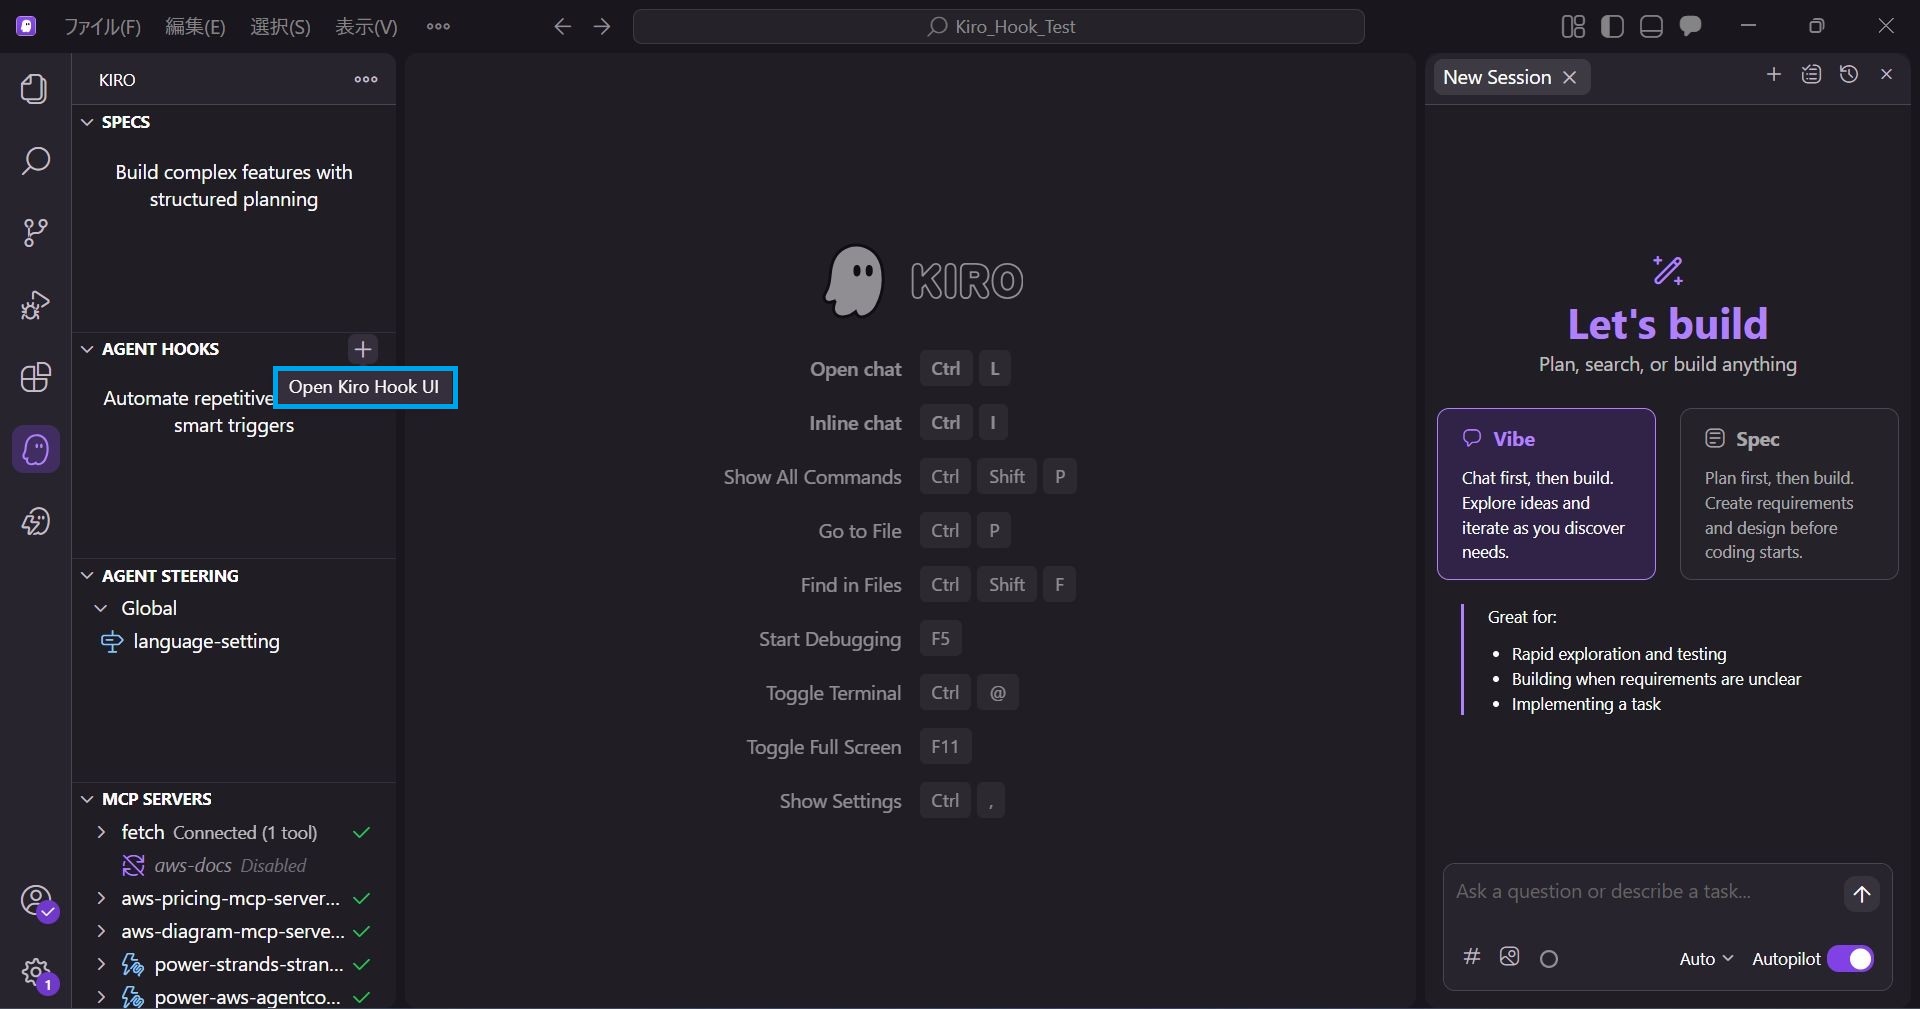
The Kiro Hook settings screen will open.
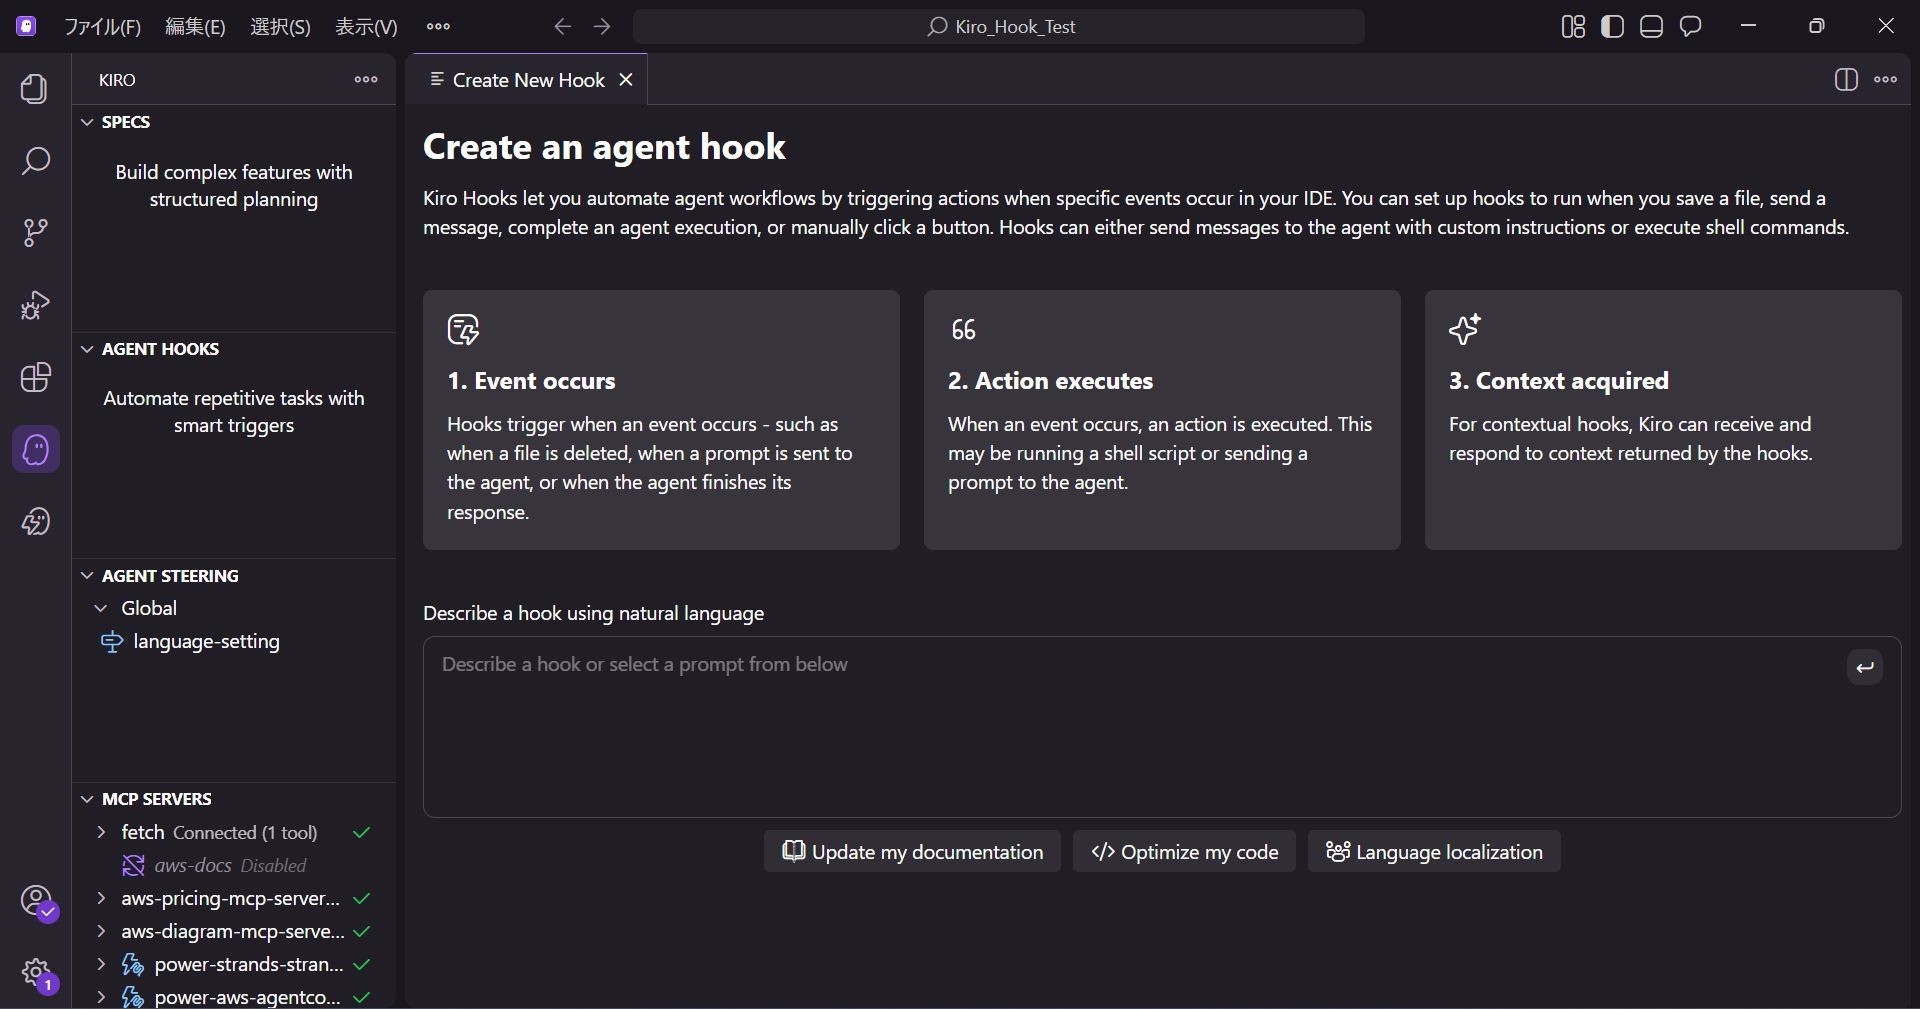
The meaning of each item is as follows:
- 1. Event occurs: Describes that the Hook is triggered when an event occurs (such as file deletion or prompt submission).
- 2. Action executes: Describes that an action (executing a script or sending a prompt to the agent) is executed when the event occurs.
- 3. Context acquired: Describes that it reads the context and responds based on the acquired information.
2. Creating a Hook
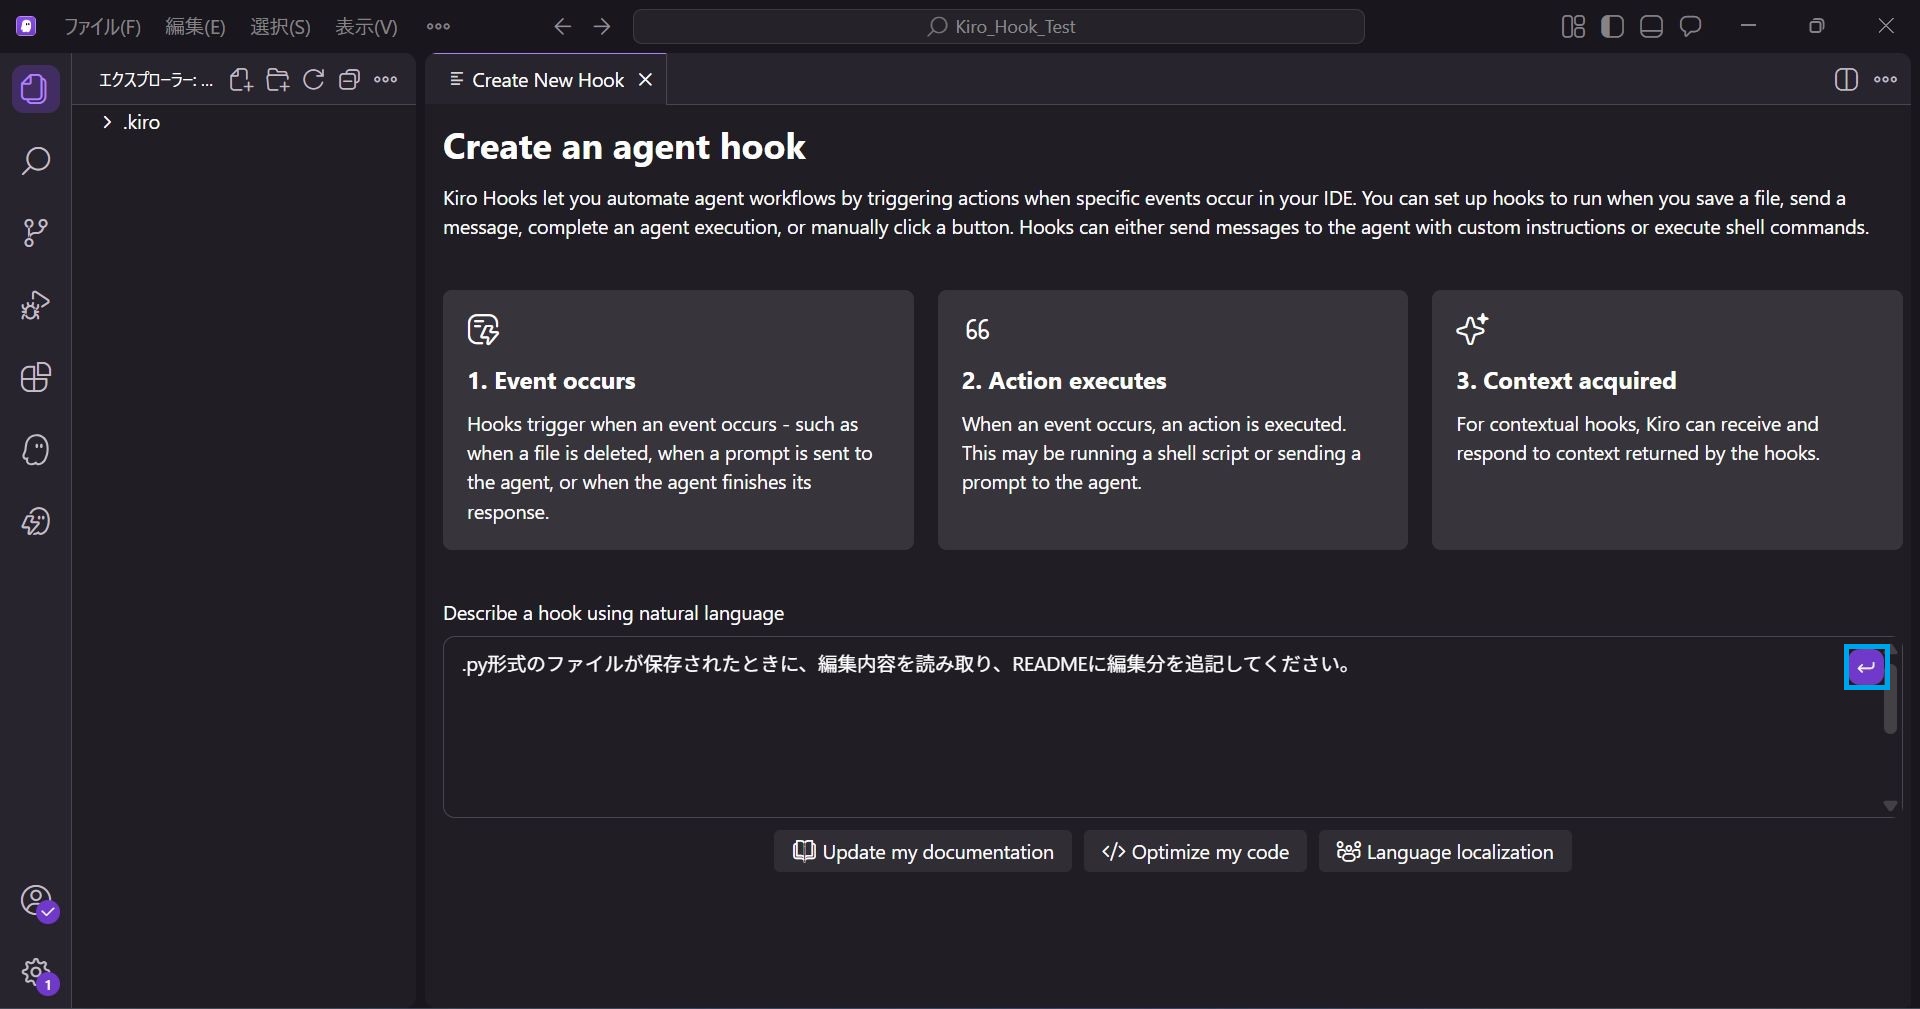
In the Describe a hook using natural language input field at the bottom of the screen, enter the behavior you want the AI to handle.
Based on the natural language entered here, Kiro will automatically generate the Hook configuration.
This time, we will enter the following:
When a .py file is saved, read the edits and append the changes to the README.
Once entered, the ↩ mark at the top right becomes selectable, so click it.
A new chat session will open, and Kiro will automatically proceed with creating the Hook.
3. Checking the Configuration
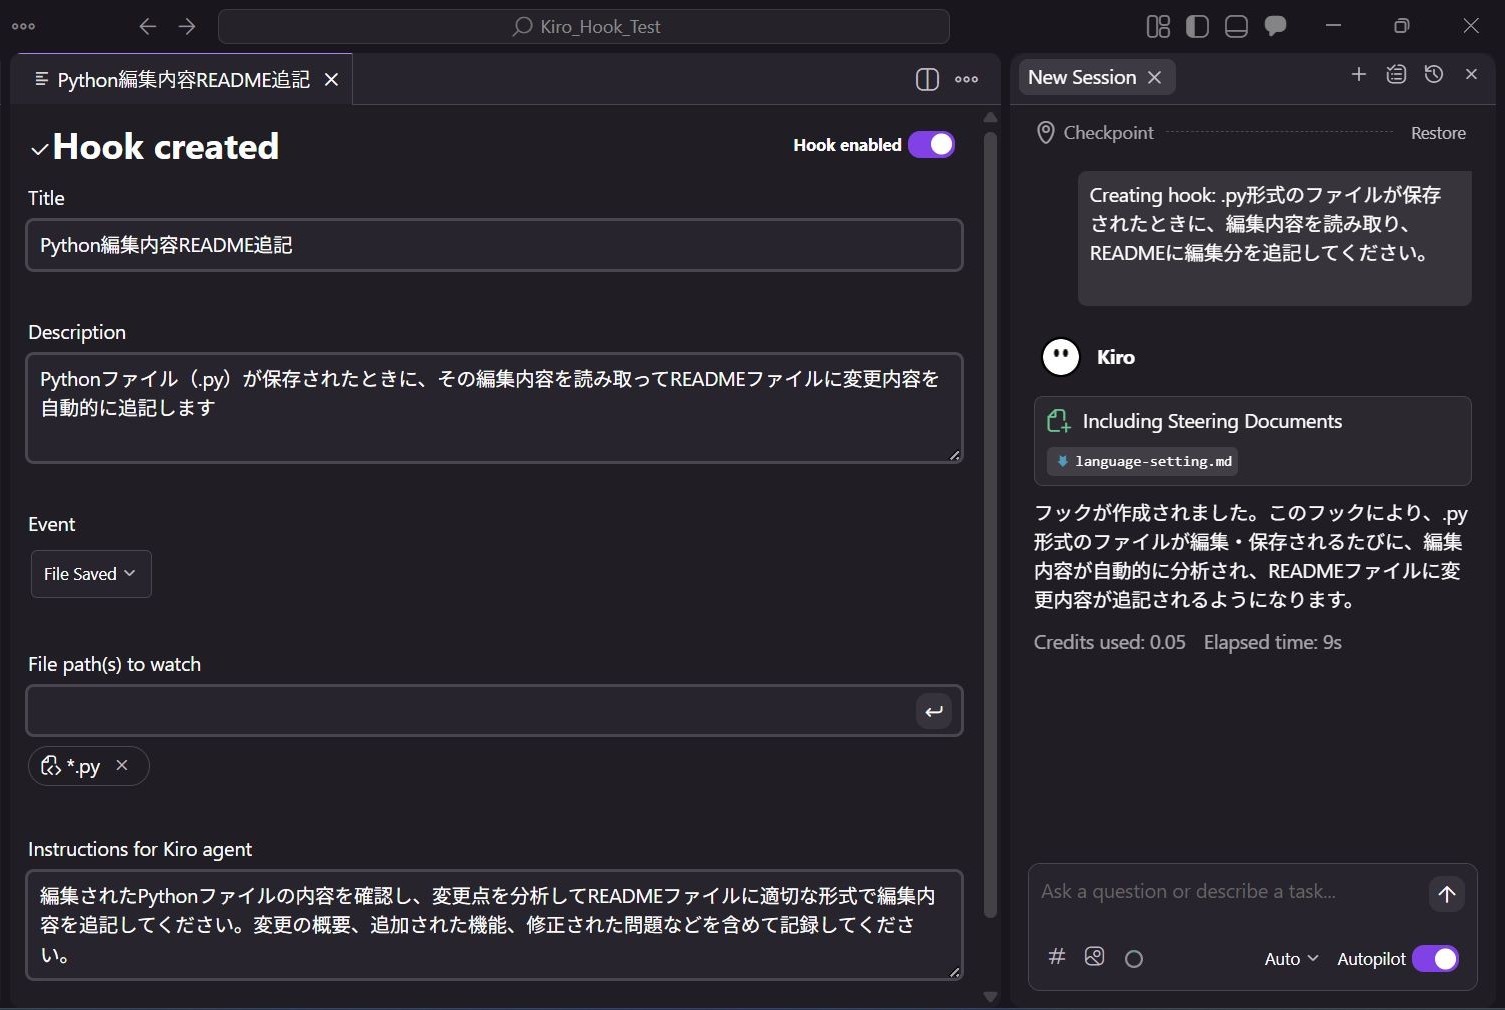
Let's check the content of the created Hook.

Title
The name of the created hook is set here.
Description
A description of the created Hook is set here.
Event
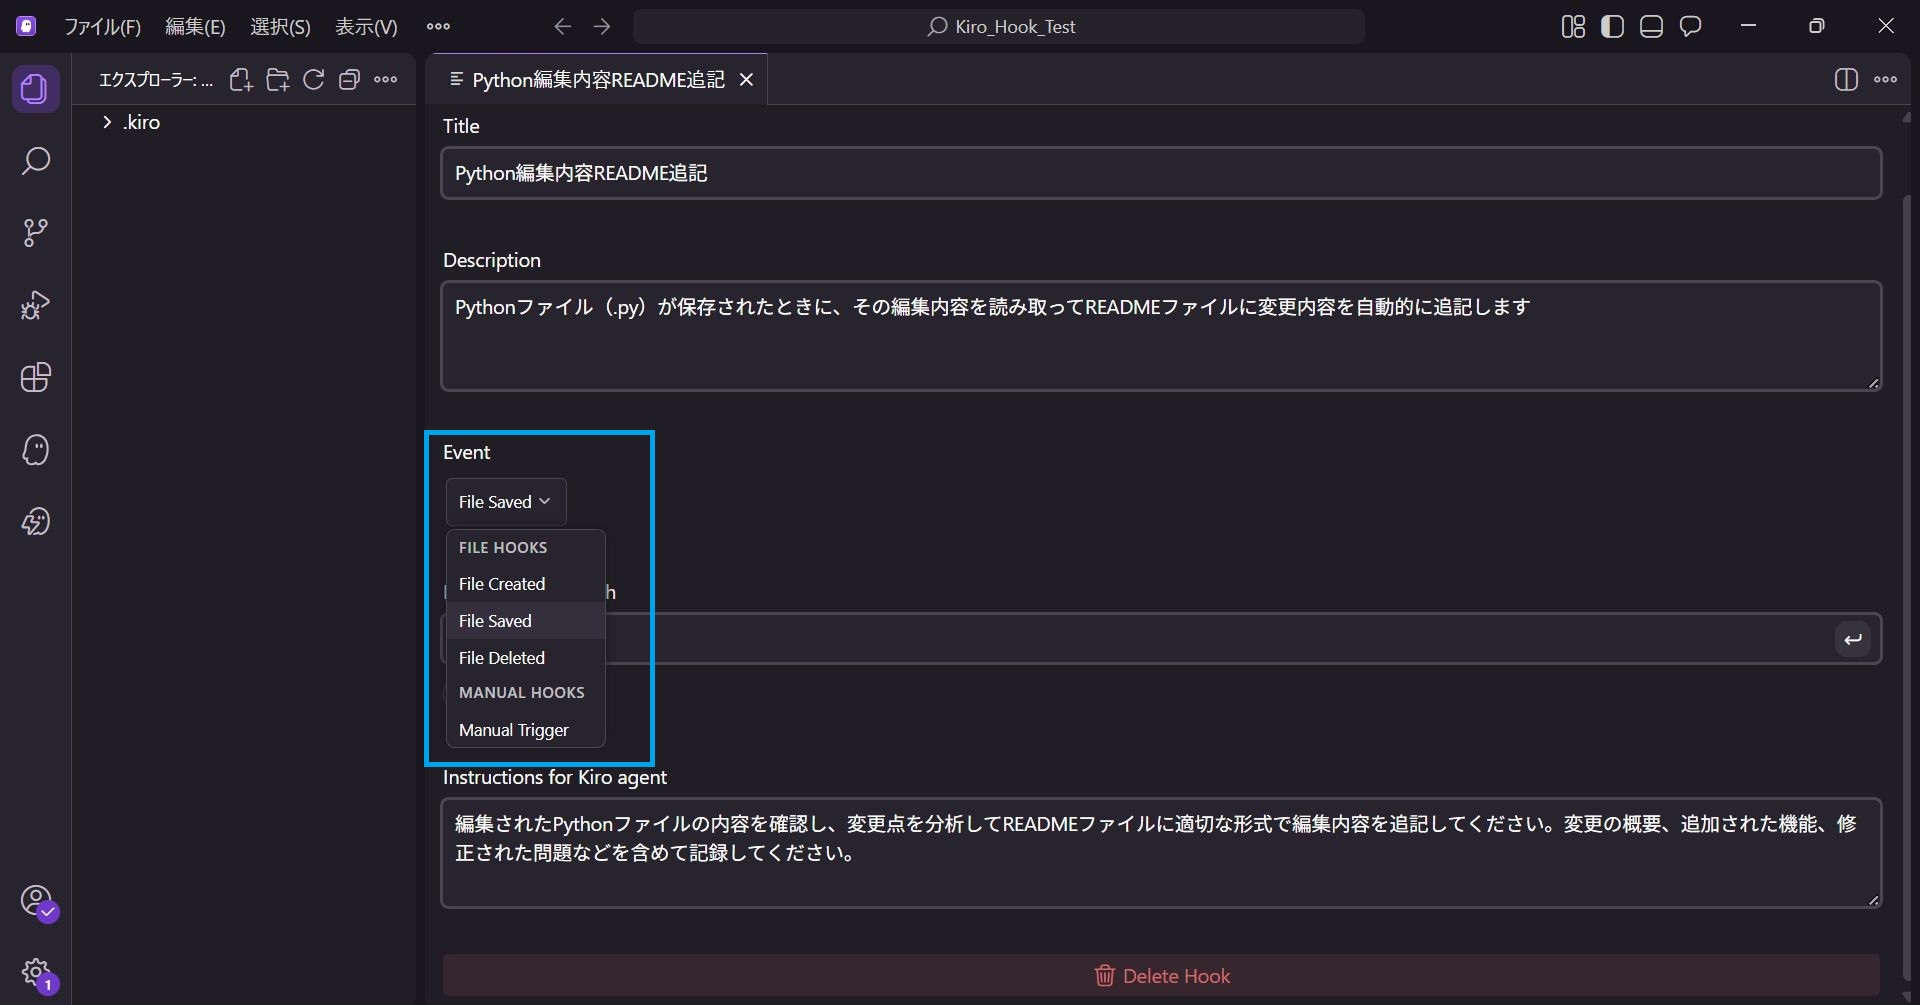
This sets what action triggers the Hook.
Since we specified "when a file is saved", File Saved is selected.
You can also select options like "File Created" or "File Deleted".
File Path(s) to watch
Specifies the file paths to detect the Event.
Since we specified `.py` format, it is set to *.py.
This ensures the Hook activates when any file with the `.py` extension is saved, regardless of the filename.
Instructions for Kiro agent
The prompt to be sent to the Kiro agent when the Hook activates is set here.
*All items can be manually edited, so if the settings differ from your intent, you can modify them manually.
Verification: Auto-updating README
Now that the setup is complete, let's verify it.
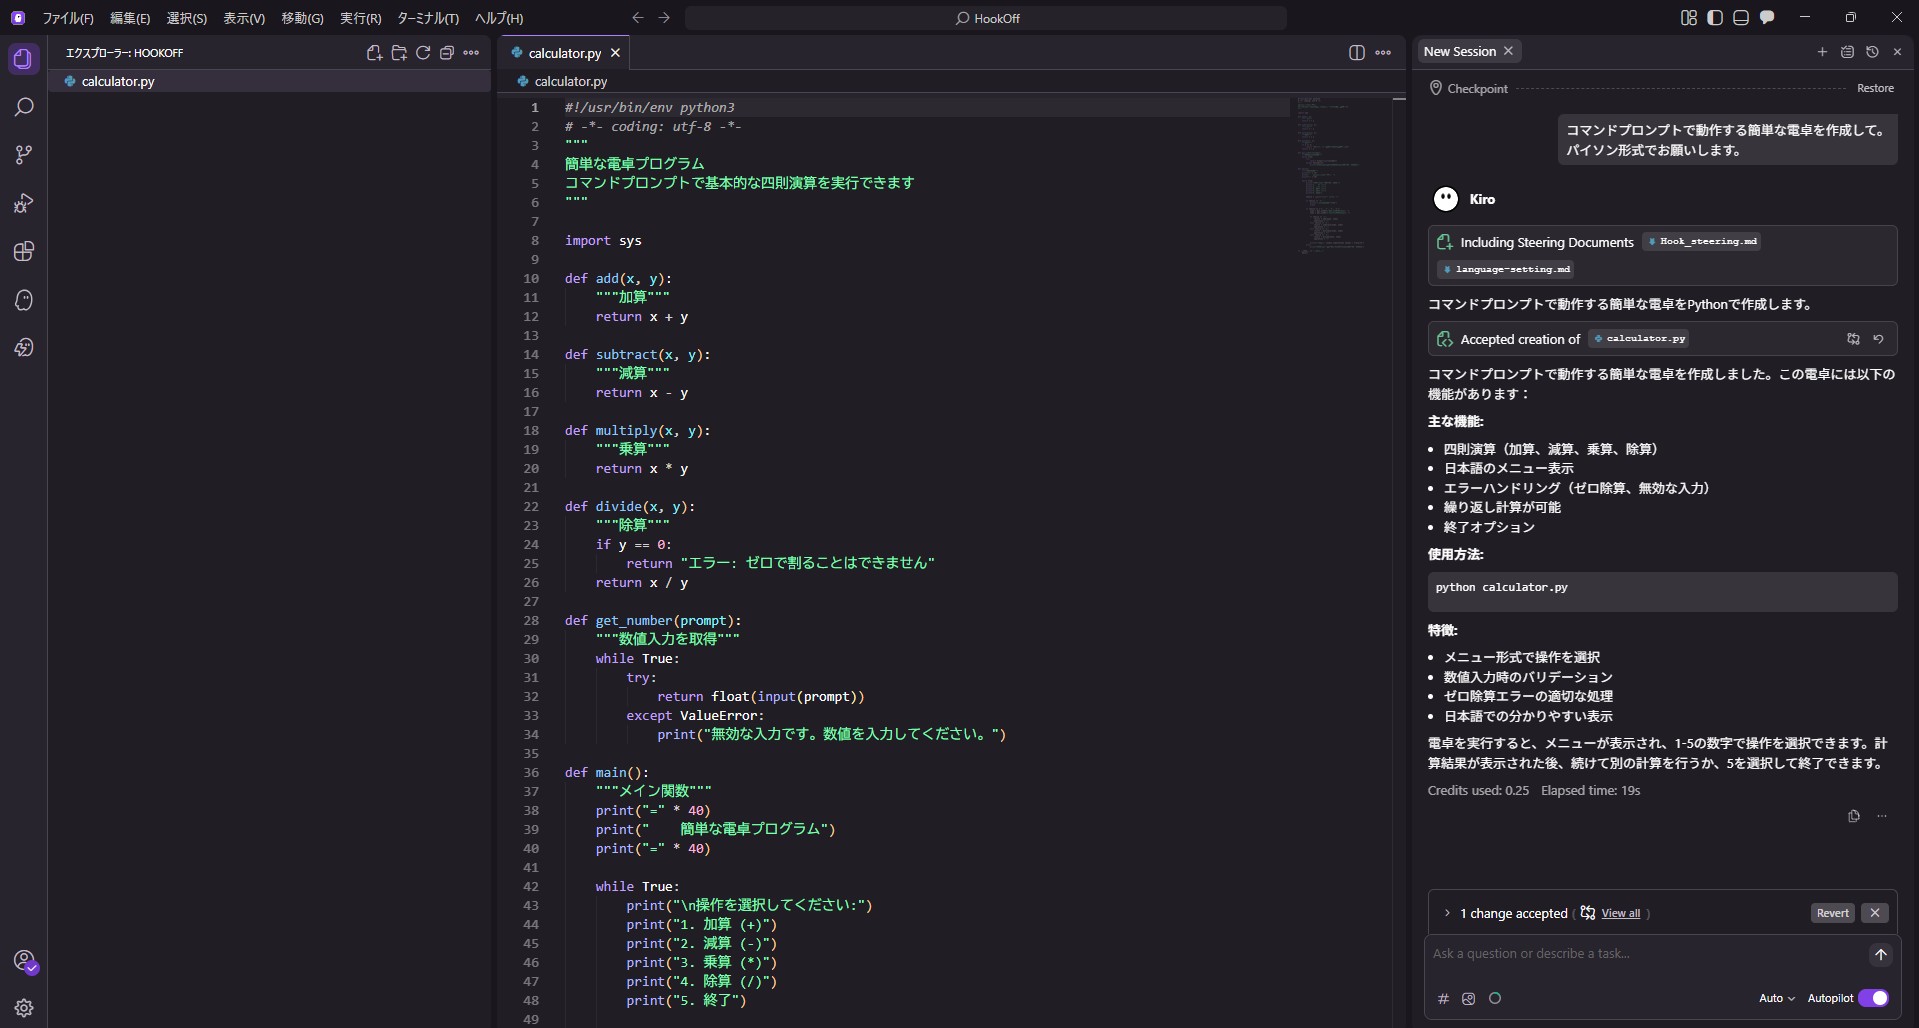
We will ask Kiro: "Create a simple calculator that runs on the command prompt. Please use Python format."
Without Hook
When the request was made without setting up a Hook, only calculator.py was created.
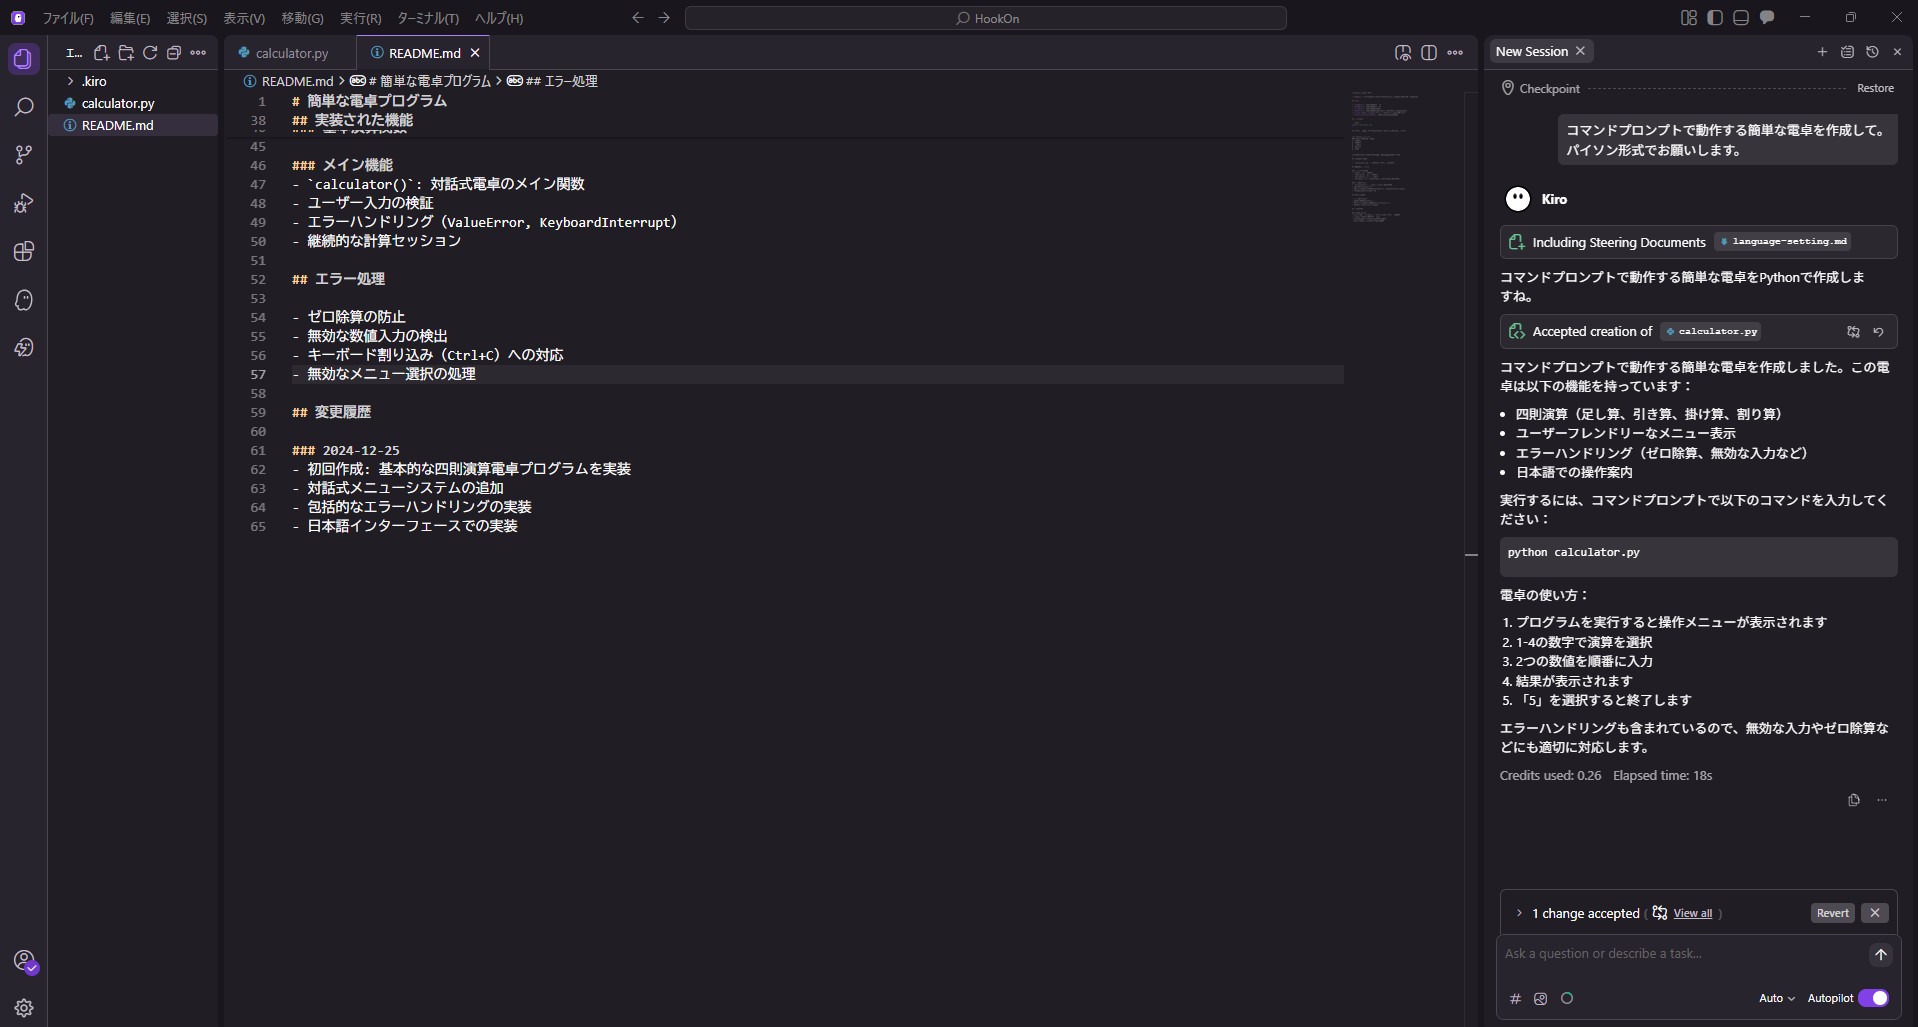
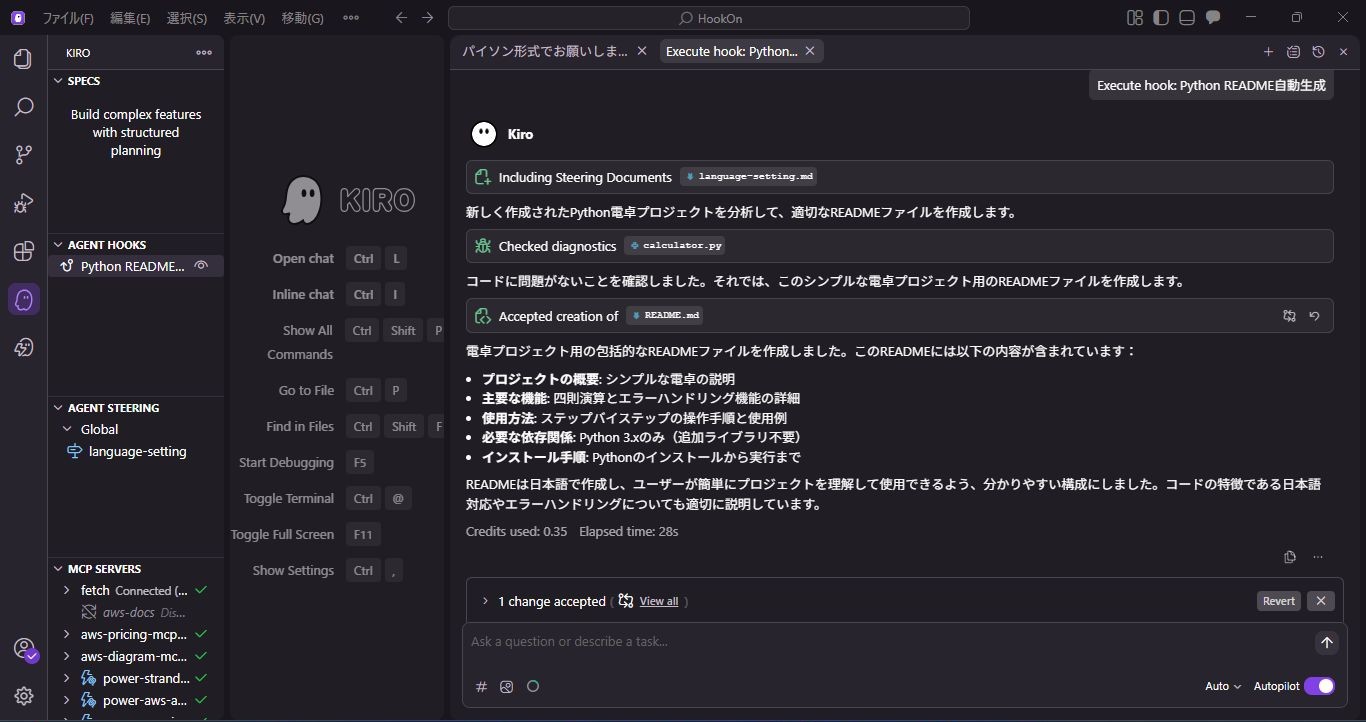
With Hook
When the request was made with the Hook set up, README.md was created simultaneously with calculator.py.
Checking the Hook section during generation, it shows a loading status, indicating the Hook is running in the background.
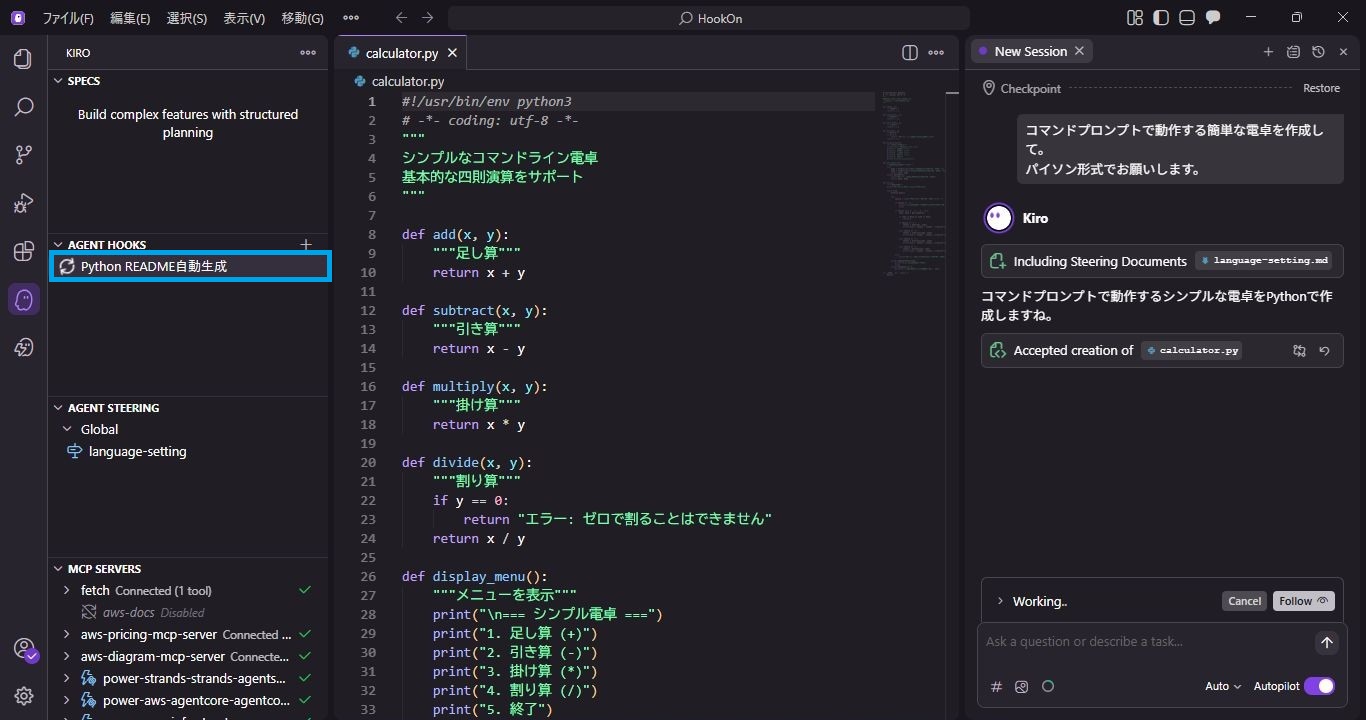
Clicking on the Hook allows you to see the README being created in a separate session.
Generated README Content
The automatically generated README described the program's functions, usage, and change history as shown below.
However, there was one issue: the date in the change history was set to a year ago.
We used the Hook automatically created by Kiro as is this time, but this point could be improved by manually correcting the instructions.
# Simple Calculator Program

A Python calculator application supporting basic arithmetic operations.

## Features

- **Addition**: Add two numbers
- **Subtraction**: Subtract two numbers
- **Multiplication**: Multiply two numbers
- **Division**: Divide two numbers (with zero division error handling)
- **Interactive Interface**: Operation selection via menu format
- **Error Handling**: Handling invalid inputs and exceptions

## Usage

```bash
python calculator.py
```

When you run the program, the following menu appears:

```
=== Simple Calculator ===
Select an operation:
1. Addition
2. Subtraction
3. Multiplication
4. Division
5. Exit

Select a number from 1-4 to execute a calculation, or 5 to exit.
```

## File Structure

- `calculator.py`: Main program file

## Implemented Functions

### Basic Arithmetic Functions
- `add(x, y)`: Addition
- `subtract(x, y)`: Subtraction
- `multiply(x, y)`: Multiplication
- `divide(x, y)`: Division (with zero division check)

### Main Functionality
- `calculator()`: Main function for the interactive calculator
- User input validation
- Error handling (ValueError, KeyboardInterrupt)
- Continuous calculation session

## Error Handling

- Prevention of division by zero
- Detection of invalid numeric input
- Handling keyboard interrupts (Ctrl+C)
- Handling invalid menu selections

## Change Log

### 2024-12-25
- Initial creation: Implemented basic arithmetic calculator program
- Added interactive menu system
- Implemented comprehensive error handling
- Implemented with Japanese interface
Summary
In this article, we introduced how to set up Agent Hooks in Kiro to automate documentation creation.
Agent Hooks can be easily created with natural language and eliminate small hassles for developers.
Please try automating your daily routine tasks with Agent Hooks and experience the benefits!
We aim to become Japan's #1 resource for Kiro! Our mission is to evangelize this technology by empowering end-users with top-tier education and technical support.
If you have requests such as "I want to know about this service" or "AWS environment construction/migration", please feel free to contact us via our inquiry form. For inquiries regarding complex matters, our sales team will contact you directly. Also, please check out the links below if you are interested!
<QES Related Solutions/Blogs>
<The AWS Security Consortium (ASC-J), in which QES participates, has released a white paper>
※Amazon Web Services, the "Powered by Amazon Web Services" logo, and other AWS trademarks used in this blog are trademarks of Amazon.com, Inc. or its affiliates in the United States and other countries.