記事公開日
最終更新日
ASP.NET CoreでgRPCサービスを作ってみた
マイクロサービスを調べていると、REST APIと並んで、よく gRPCというキーワードが出てきます。
今回は、gRPCを試してみることにします。
gRPCは、Googleが開発した、HTTP/2を使用したリモートプロシージャコール(RPC)を実現するプロトコルの1つです。
※gRPC、OpenAPI、RESTの違いについての説明は、以下に記載されていますので、興味があれば参照してみてください。
→API 設計: gRPC、OpenAPI、REST の概要と、それらを使用するタイミングを理解する
過去の『ASP.NET CoreでAPIを作ってみた』の回では、『従業者管理API』をREST APIで実装しました。
今回は、gRPCでデータベースへの簡単なCRUD(生成、読み取り、更新、削除)処理を行う「部署管理API」を作成してみます。
ちなみにQESではクラウドエンジニアも募集していますので
QESの仕事内容や転職にご興味のある方はこちらもご覧ください。

1.環境
本記事では、以下の環境を使用しています。- OS:Windows 10
- IDE:Visual Studio 2019
- データベース:SQL Server 2016 Express LocalDB
- プログラミング言語:C#
- アプリケーション基盤:ASP.NET Core 3.1
データの保存先として、部署テーブルを使用します。
マイクロサービス的な考え方では、別のデータベースを用意した方がよさそうですが、
お試しということで、従業者管理APIが使っていたDBと同じところに用意しています。
部署コードと部署名がある単純なテーブルになります。
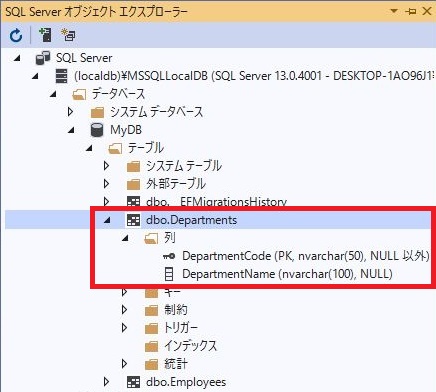
今回は、この Departments テーブルに対して、gRPCでCRUD処理を実装していきます。
2. gRPCサービスの作成
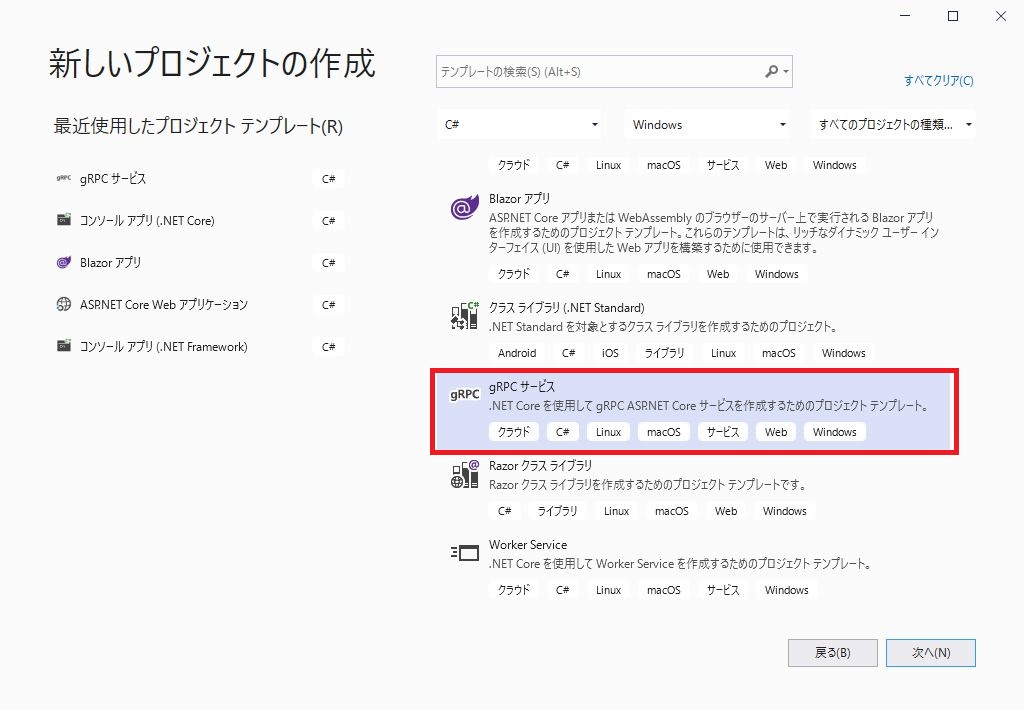
まずは、部署管理のgRPCサービスを作成していきます。いつも通り、Visual Studio 2019を開き、『新しいプロジェクトの作成』をクリックします。
『新しいプロジェクトの作成』画面で『gRPC サービス』を選択し、次へ進みます。
続けて、プロジェクト名、ソリューション名に任意の名前を入力し、プロジェクトの作成先を選択します。
今回は以下の内容で作成しました。
ソリューション名:『GrpcDepartment』
プロジェクト名:『GrpcDepartment』
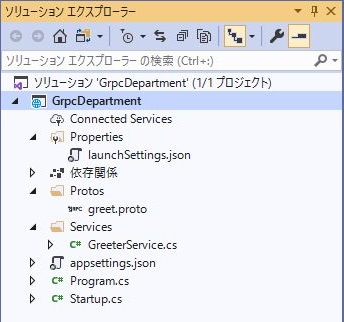
ソリューションエクスプローラーに画像のようなプロジェクトができていればプロジェクトの作成まで完了です!
gRPCサービスのプロジェクトを作成すると、サンプルとしてgreet(あいさつ)サービスが実装されています。
単純な文字列を返すサービスになります。
サンプルの実行をそのまま試したい方は、以下のマイクロソフト社のページをご参照ください。
→チュートリアル: ASP.NET Core で gRPC のクライアントとサーバーを作成する
今回もEntityFrameworkCoreを使用しますので、NuGetパッケージの管理から、以下のパッケージをインストールします。
- Microsoft.EntityFrameworkCore
- Microsoft.EntityFrameworkCore.SqlServer
(1)protoファイルの作成
protoファイルは、gRPCのインターフェース定義ファイルになります。部署管理APIで用意する機能は、以下の通りとし、
これをベースにprotoファイルを作成します。
| プロシージャ | 機能 |
|---|---|
| GetDepartments | 部署一覧を取得します。 |
| GetDepartment | 指定した部署情報を取得します。 |
| RegistDepartment | 新規部署を登録します。 |
| UpdateDepartment | 登録済の部署を更新します。 |
| DeleteDepartment | 登録済の部署を削除します。 |
プロジェクトの Protos フォルダ配下に以下の内容の [Department.proto] を追加します。
プロジェクトを作成した際に自動的に作成されている [greet.proto] ファイルは、削除します。
■Department.proto
syntax = "proto3";

option csharp_namespace = "GrpcDepartment";

package department;

service DepartmentSrv {
  rpc GetDepartments (Empty) returns (Departments);
  rpc GetDepartment (DepartmentKey) returns (Department);
  rpc RegistDepartment (Department) returns (Empty);
  rpc UpdateDepartment (Department) returns (Empty);
  rpc DeleteDepartment (DepartmentKey) returns (Empty);
}

message Empty {
}

message Departments {
   repeated Department items = 1;
}

message Department {
  string DepartmentCode = 1;
  string departmentName = 2;
}

message DepartmentKey {
   string DepartmentCode = 1;
}
protoファイルは、プロジェクトファイルに定義を追加する必要があります。
ソリューションエクスプローラーから、プロジェクト名を右クリックし、「プロジェクト ファイルの編集」をクリックします。
プロジェクトファイルを以下のように編集します。
■プロジェクトファイル
<Project Sdk="Microsoft.NET.Sdk.Web">

  <PropertyGroup>
    <TargetFramework>netcoreapp3.1</TargetFramework>
  </PropertyGroup>

  <ItemGroup>
    <Protobuf Include="Protos\Department.proto" GrpcServices="Server" />
  </ItemGroup>

  <ItemGroup>
    <PackageReference Include="Grpc.AspNetCore" Version="2.27.0" />
    <PackageReference Include="Microsoft.EntityFrameworkCore" Version="3.1.7" />
    <PackageReference Include="Microsoft.EntityFrameworkCore.SqlServer" Version="3.1.7" />
  </ItemGroup>

</Project>
(2)DBアクセス用クラスの作成
次にDepartmentsテーブルにアクセスするためのクラスを追加します。プロジェクトを右クリックし、「追加」→「新しいフォルダー」を選択し、[Models]フォルダを作成します。
[Models] フォルダが作成できたら、以下のファイルを追加登録します。
■Department.cs
using System;
using System.Collections.Generic;
using System.ComponentModel.DataAnnotations;
using System.Linq;
using System.Threading.Tasks;

namespace GrpcDepartment.Models
{
    public class Department
    {
        [Key]
        [Required]
        [StringLength(50)]
        public string DepartmentCode { get; set; }

        [Required]
        [StringLength(100)]
        public string DepartmentName { get; set; }
    }
}
■GrpcDbContext.cs
using System;
using System.Collections.Generic;
using System.Linq;
using System.Threading.Tasks;
using Microsoft.EntityFrameworkCore;

namespace GrpcDepartment.Models
{
    public class GrpcDbContext : DbContext
    {
        public GrpcDbContext(DbContextOptions options)
            : base(options)
        {
        }

        public DbSet Departments { get; set; }
    }
}
(3)サービス本体の作成
サービス本体のプログラムを作成します。[Services]フォルダ配下に、以下のファイルを配置します。
※もともと作成されていた、GreetService.csは、削除します。
■DepartmentService.cs
using System;
using System.Collections.Generic;
using System.Linq;
using System.Threading.Tasks;
using Grpc.Core;
using Microsoft.Extensions.Logging;

using GrpcDepartment.Models;

namespace GrpcDepartment
{
    public class DepartmentService : DepartmentSrv.DepartmentSrvBase
    {
        private readonly ILogger _logger;

        private GrpcDbContext _db = null;

        public DepartmentService(ILogger logger, GrpcDbContext db)
        {
            _logger = logger;

            _db = db;
        }

        public override Task GetDepartments(Empty requestData, ServerCallContext context)
        {
            Departments responseData = new Departments();
            var query = from dep in _db.Departments
                        select new Department()
                        {
                            DepartmentCode = dep.DepartmentCode,
                            DepartmentName = dep.DepartmentName
                        };

            responseData.Items.AddRange(query.ToArray());
            return Task.FromResult(responseData);
        }

        public override Task GetDepartment(DepartmentKey requestData, ServerCallContext context)
        {
            var dep = _db.Departments.Find(requestData.DepartmentCode);

            Department responseData = new Department
            {
                DepartmentCode = dep.DepartmentCode,
                DepartmentName = dep.DepartmentName
            };


            return Task.FromResult(responseData);
        }

        public override Task RegistDepartment(Department requestData, ServerCallContext context)
        {
            Models.Department data = new Models.Department
            {
                DepartmentCode = requestData.DepartmentCode,
                DepartmentName = requestData.DepartmentName
            };

            _db.Departments.Add(data);
            _db.SaveChanges();

            return Task.FromResult(new Empty());
        }

        public override Task UpdateDepartment(Department requestData, ServerCallContext context)
        {
            Models.Department data = new Models.Department
            {
                DepartmentCode = requestData.DepartmentCode,
                DepartmentName = requestData.DepartmentName
            };

            _db.Departments.Update(data);
            _db.SaveChanges();

            return Task.FromResult(new Empty());
        }

        public override Task DeleteDepartment(DepartmentKey requestData, ServerCallContext context)
        {
            var data = _db.Departments.Find(requestData.DepartmentCode);

            _db.Departments.Remove(data);
            _db.SaveChanges();

            return Task.FromResult(new Empty());
        }
    }
}
「DepartmentSrv.DepartmentSrvBase」等は、今までのコードに登場していませんが、ビルドすると protoファイルから裏で自動的に生成されています。
(4)StartUpの修正
『StartUp.cs』に以下の通りに修正します。■StartUp.cs
using System;
using System.Collections.Generic;
using System.Linq;
using System.Threading.Tasks;
using GrpcDepartment.Models;
using Microsoft.AspNetCore.Builder;
using Microsoft.AspNetCore.Hosting;
using Microsoft.AspNetCore.Http;
using Microsoft.Extensions.Configuration;
using Microsoft.Extensions.DependencyInjection;
using Microsoft.Extensions.Hosting;
using Microsoft.EntityFrameworkCore;

namespace GrpcDepartment
{
    public class Startup
    {
        public IConfiguration Configuration { get; }

        public Startup(IConfiguration configuration)
        {
            Configuration = configuration;
        }

        // This method gets called by the runtime. Use this method to add services to the container.
        // For more information on how to configure your application, visit https://go.microsoft.com/fwlink/?LinkID=398940
        public void ConfigureServices(IServiceCollection services)
        {
            string connectionString = Configuration.GetConnectionString("DefaultConnection");

            services.AddDbContext(opt =>
                opt.UseSqlServer(connectionString));

            services.AddGrpc();
        }

        // This method gets called by the runtime. Use this method to configure the HTTP request pipeline.
        public void Configure(IApplicationBuilder app, IWebHostEnvironment env)
        {
            if (env.IsDevelopment())
            {
                app.UseDeveloperExceptionPage();
            }

            app.UseRouting();

            app.UseEndpoints(endpoints =>
            {
                endpoints.MapGrpcService();

                endpoints.MapGet("/", async context =>
                {
                    await context.Response.WriteAsync("Communication with gRPC endpoints must be made through a gRPC client. To learn how to create a client, visit: https://go.microsoft.com/fwlink/?linkid=2086909");
                });
            });
        }
    }
}
『Appsetting.json』内にSQL Serverの接続情報を追加します。
"ConnectionStrings": {
    "DefaultConnection": "Data Source=(localdb)\\MSSQLLocalDB;Initial Catalog=MyDB;Integrated Security=True;"
}
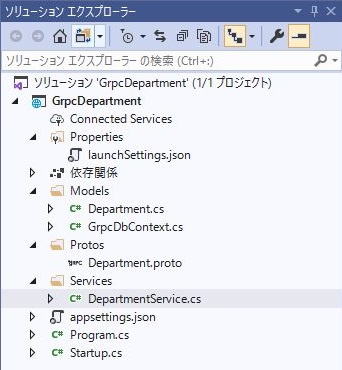
一通り設定したプロジェクトの状態は、以下になります。
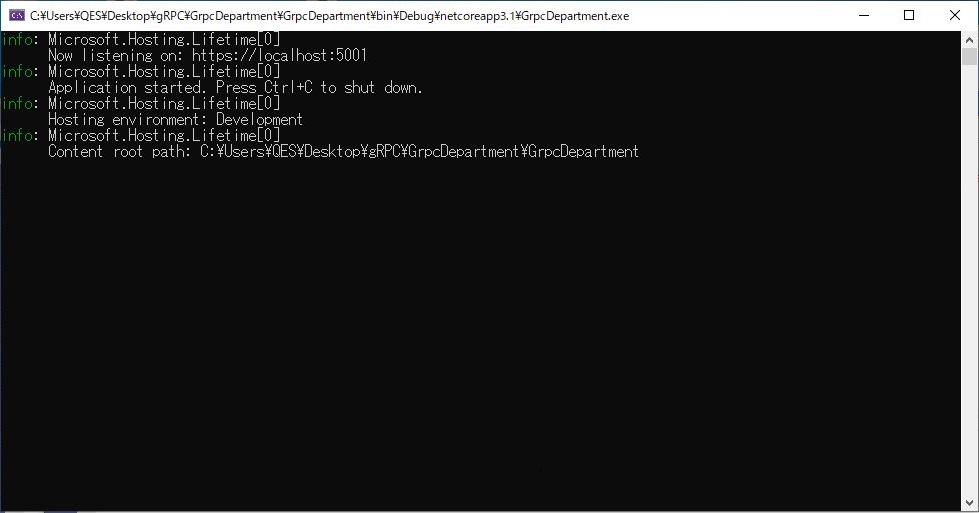
準備が整ったので、実行してみます。
実行すると以下のような画面が表示され、localhost の 5001ポートで待ち受けていることが分かります。
3.動作確認用クライアントの作成
次に、サービスを呼び出すクライアントを作成します。単純な接続確認クライアントのため、コンソールアプリケーション(.NET Core)で実装します。
こちらはプロジェクト名を「GrpcDepartmentClient」としてみました。
Grpcクライアントでは、以下のパッケージが必要となりますので、
NuGetパッケージの管理からインストールします。
- Grpc.Net.Client
- Google.Protobuf
- Grpc.Tools
サービス側同様、クライアント側にも proto ファイルの登録が必要となります。
[Protos]フォルダを作成し、配下にサービス側と同じファイル[Department.proto]を格納してください。
続けて、プロジェクトファイルにprotoファイルの定義を追加します。
※ サービス側とほぼ同じですが、GrpcServices の設定値は、[Client]になります。
<Project Sdk="Microsoft.NET.Sdk">

  <PropertyGroup>
    <OutputType>Exe</OutputType>
    <TargetFramework>netcoreapp3.1</TargetFramework>
  </PropertyGroup>

  <ItemGroup>
    <Protobuf Include="Protos\Department.proto" GrpcServices="Client" />
  </ItemGroup>

  <ItemGroup>
    <PackageReference Include="Google.Protobuf" Version="3.13.0" />
    <PackageReference Include="Grpc.Net.Client" Version="2.31.0" />
    <PackageReference Include="Grpc.Tools" Version="2.31.0">
      <PrivateAssets>all</PrivateAssets>
      <IncludeAssets>runtime; build; native; contentfiles; analyzers; buildtransitive</IncludeAssets>
    </PackageReference>
  </ItemGroup>

</Project>
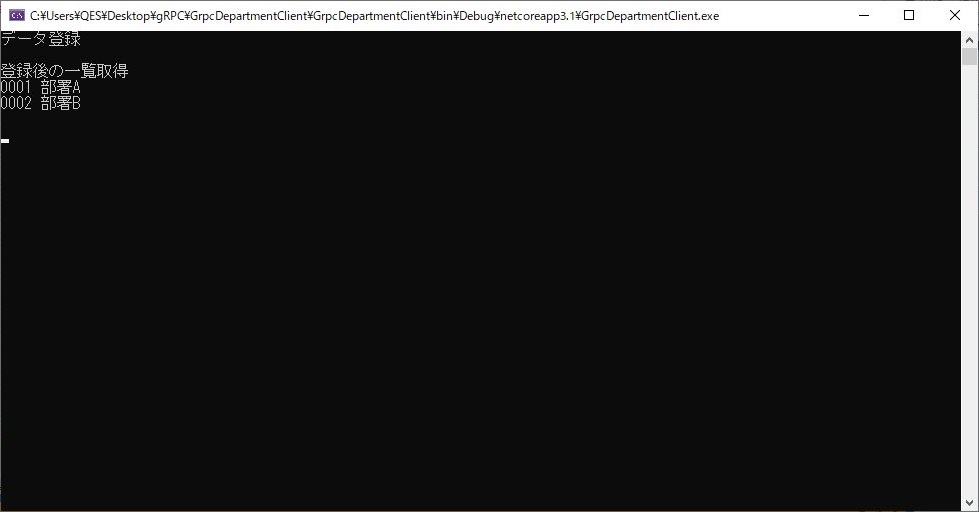
[Program.cs]ファイルに、接続のサンプルコードを記載して、実行してみます。
部署登録と登録後の一覧取得するプロシージャを呼び出しています。
■Program.cs
using Grpc.Net.Client;
using GrpcDepartment;
using System;

namespace GrpcDepartmentClient
{
    class Program
    {
        static void Main(string[] args)
        {
            using var channel = GrpcChannel.ForAddress("https://localhost:5001");
            var client = new DepartmentSrv.DepartmentSrvClient(channel);

            Console.WriteLine("データ登録");
            client.RegistDepartment(new Department { DepartmentCode = "0001", DepartmentName = "部署A" });
            client.RegistDepartment(new Department { DepartmentCode = "0002", DepartmentName = "部署B" });
            Console.WriteLine("");

            Console.WriteLine("登録後の一覧取得");
            Departments departments = client.GetDepartments(new Empty());

            foreach (var item in departments.Items)
            {
                Console.WriteLine(item.DepartmentCode + " " + item.DepartmentName);
            }
            Console.WriteLine("");

            Console.ReadKey();
        }
    }
}
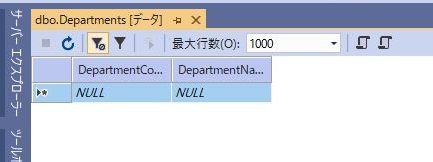
実行前のテーブルは、空の状態にしておきます。
クライアントアプリを実行し、正常終了すると以下のような画面が出力されます。
実行エラーになった場合は、エラーメッセージが出力されますので、環境をご確認ください。
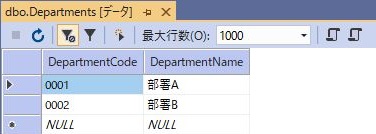
実行後のテーブルは、以下の通りになりました。
「部署A」と「部署B」が登録されていることが確認できます。
4. 最後に
今回は、gRPCを使用した簡単なAPIを作成してみました。※エラー処理等は実装していませんので、実際に使用するためには、細かい実装が必要になります。
前回までの従業者管理APIと今回の部署管理APIで、2つのサービスができました。
次回以降、連携させていきたいと思っています。
QESでは様々なアプリケーションの開発・導入を行っております。
私共が提供するサービス・ソリューションにつきましてはこちらに掲載しております。
また、現在Power Platform に力を入れて取り組んでいます。Power Apps等のPower Platformについては、こちらをご覧ください。
システム開発・構築でお困りの問題や弊社が提供するサービス・ソリューションにご興味を抱かれましたら、是非一度お問い合わせください。
このブログで参照されている、Microsoft、